By the end of this section, you'll be able to:
- Find your way around the Vehicles page and use filters, search and the rows-per-page control
- Add a new vehicle and validate the registration plate
- Allocate or change the driver assigned to a vehicle
- Update a vehicle's fleet category
- Remove a vehicle from the fleet (and keep its history)
- Export the vehicle list as a CSV
Opening the Vehicles page
![]()
From the Top Navigation Bar, click Vehicles. You'll land on the central list of every vehicle currently uploaded to the system — this is the page you'll come back to for almost everything fleet-related.
💡 If Vehicles is underlined in blue on the Top Navigation Bar, you're in the right place.
Filters and table controls
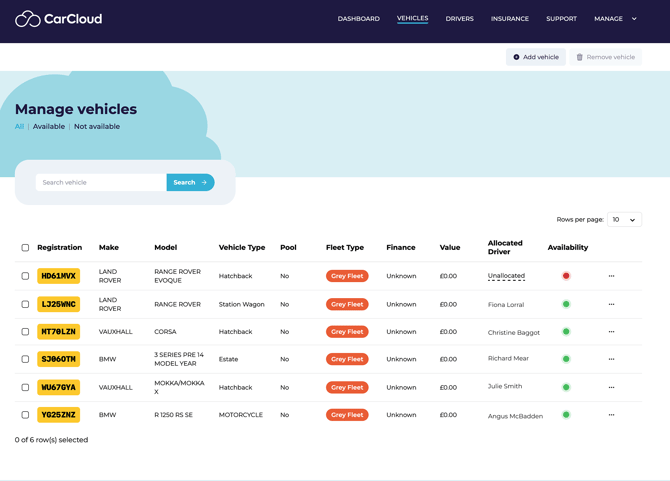
The Vehicles table comes with three quick filters and a couple of view controls so you can narrow the list to what matters right now:
|
Filter |
What it shows |
|---|---|
|
All vehicles |
The full list — everything on your fleet |
|
Available vehicles |
Vehicles ready to be used or allocated |
|
Not available vehicles |
Vehicles temporarily out of action (in for service, off-road, etc.) |
Use Rows per page to change how many vehicles you see at once — handy if you've got a large fleet and want to scroll less.
Use Export CSV to download the current view as a spreadsheet for sorting, sharing or external reporting.
Searching for a vehicle
The fastest way to find a specific vehicle is the Search field at the top of the page. You can search by:
- Registration number
- Make or model
- Allocated driver name
- Any other value visible in the table
Type your term and click Search. The table will filter to matching rows.
💡 Search is most useful when you know what you're looking for. If you're browsing or auditing the fleet, the filters in Step 2 are usually more helpful.
The Actions menu — what you can do per vehicle
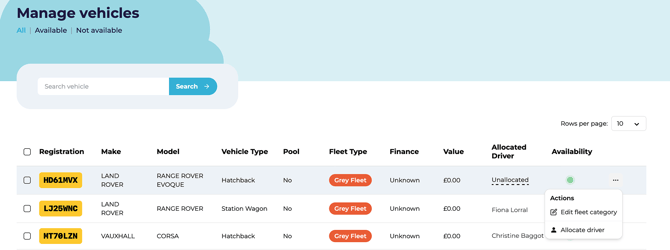
Each vehicle row has a three-dot (⋯) Actions menu at the end. Open it to:
- Edit Fleet Category — change the ownership / category type
- Allocate Driver — assign a driver to the vehicle
- Deallocate Driver — remove the current driver
These three actions cover most of your day-to-day vehicle maintenance.
Updating a vehicle's fleet category
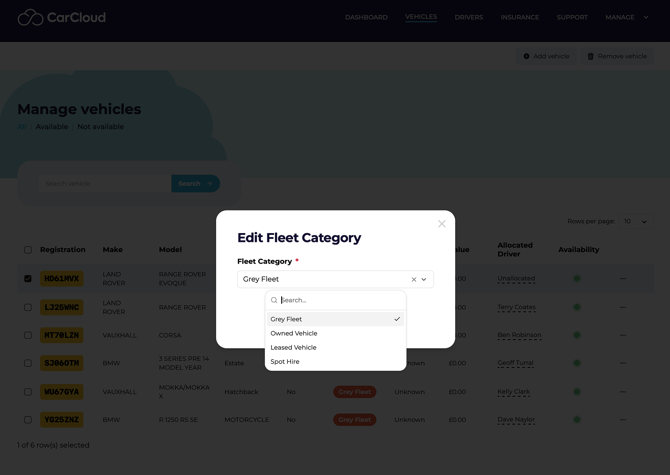
To update a single vehicle's fleet category:
- Open the Actions menu on the vehicle row.
- Click Edit Fleet Category.
- Remove the current category in the pop-up if it's wrong.
- Select the correct new category.
- Click Save to apply.
Have a quick look at the table afterwards to confirm the new category is showing.
Allocating or changing a driver
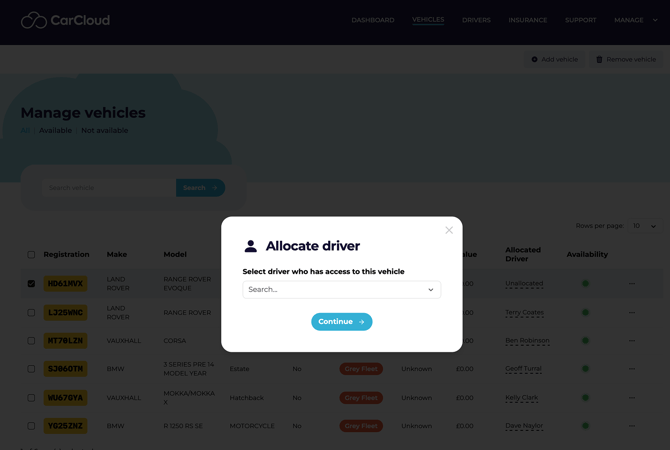
To change which driver is assigned to a vehicle:
- Open the Actions menu on the vehicle row.
- Click Deallocate Driver.
- Review the currently assigned driver, then click the X to clear them.
- Search for the new driver and select them.
- Click Continue to confirm.
Check the vehicle row afterwards — the new driver should appear in the Allocated driver column.
💡 Need to remove a driver without replacing them? Use Deallocate Driver and skip the reassignment step. The vehicle will sit unassigned until you allocate someone new.
Adding a new vehicle
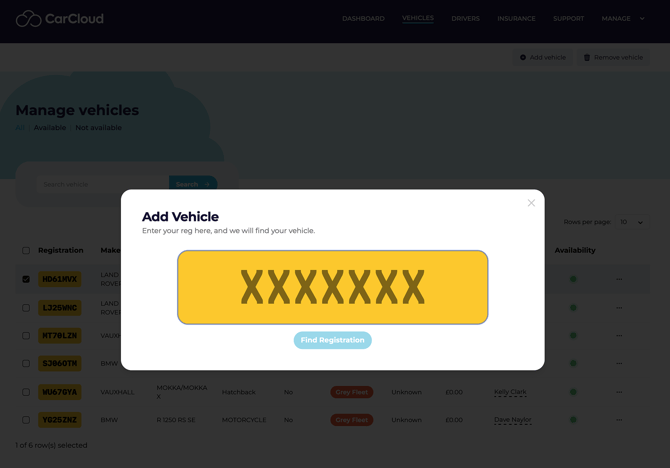
When a new vehicle joins your fleet:
- Click Add Vehicle at the top-right of the Vehicles page.
- Enter the vehicle name and registration plate.
- Click Find Registration to validate the plate and pull the vehicle details from the registration database.
- Select the appropriate Fleet Category.
- Click Save Vehicle.
The new vehicle will appear in the Vehicles list immediately.
💡 CarCloud automatically populates the make, model, body type and tax/MOT status from the registration number — you don't need to enter these manually.
Removing a vehicle from the fleet
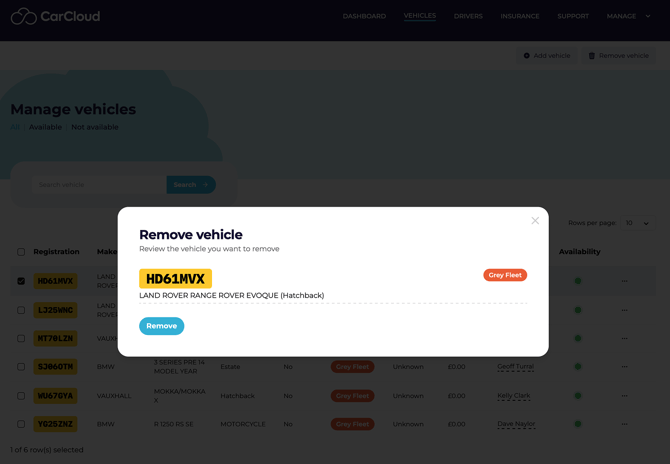
When a vehicle leaves the fleet — sold, disposed, lease ended, transferred or written off (or employee leaves and they are driving a grey fleet vehicle):
- Tick the checkbox next to the vehicle(s).
- Click Remove Vehicle.
- Review the confirmation screen and check you've selected the right vehicle(s).
- Click Remove.
Reviewing availability and exporting records
Two quick views worth knowing:
- The Not Available filter in the Vehicles list is the fastest way to see what's currently out of action.
- The All filter brings you straight back to the full fleet view.
When you need the data outside of CarCloud — for reporting, audit or analysis — use Export CSV to download the current view. Open the file in Excel, Google Sheets or any spreadsheet tool.
Tips for getting around faster
- Use the search field when you know what you're looking for (registration, model or driver name).
- Use the category filters when you're browsing or auditing.
- Adjust Rows per page to reduce paging when reviewing large fleets.
- Export to CSV whenever you want to sort, filter or audit outside CarCloud.
- Keep fleet categories and driver assignments up to date as changes happen — small upkeep prevents big tidy-ups later.
What's next?
With your vehicles in good shape, you can:
- Manage the people behind them on the Drivers Management page
- Review insurance policies on the Insurance Management page
- Set up shared vehicles on the Pool Vehicles page