By the end of this section, you'll be able to:
- Allocate a pool vehicle to a driver with the right handover details
- Verify the allocation in the logbook and driver dashboard
- Deallocate the vehicle and capture return mileage, personal mileage, and any damage
- Confirm the vehicle is back in pool status and available to allocate again
- Review the pool vehicle mileage summary after a return
Step 1: Allocate a pool vehicle to a driver

- Go to the Vehicle Data page for the individual vehicle concerned.
- Open the Pool Vehicle tab by clicking on the tab.
- Click Allocate Pool Driver.
- Select the driver you want to assign the vehicle to.
Step 2: Enter allocation details
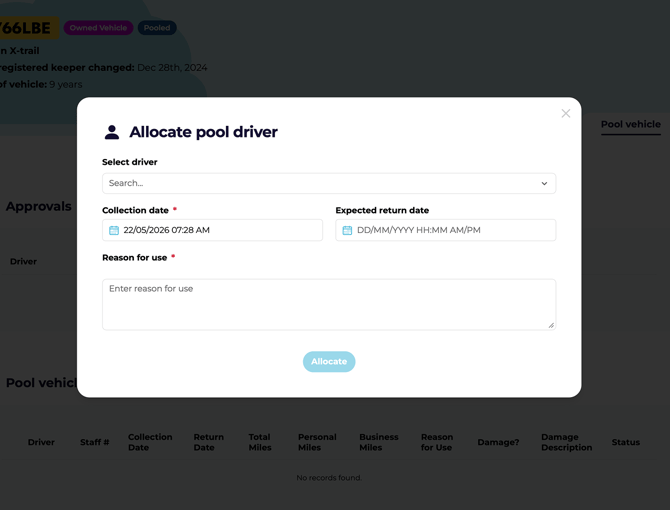
- Confirm the selected driver is correct.
- Enter the collection date:
- This usually defaults to today's date.
- Change it if the vehicle is being collected on a different date.
- Enter the expected return date.
- Add a reason for the request.
💡 Use today's date as the default collection date unless the handover is scheduled for another day. It speeds things up and keeps records consistent.
Step 3: Confirm a successful allocation
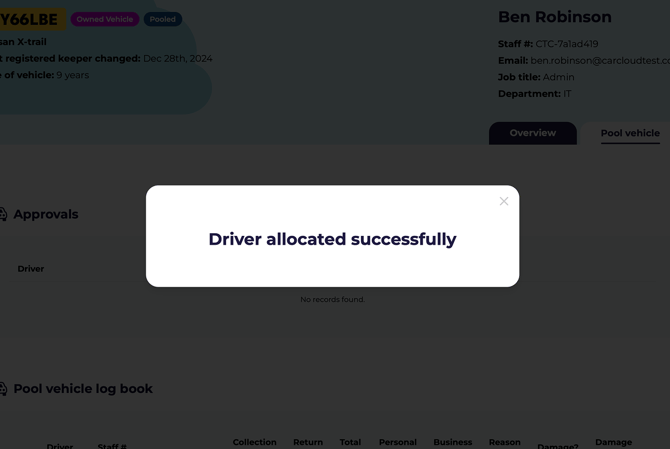
- Submit the allocation details.
- Confirm the platform shows the driver as allocated successfully.
- No additional fleet admin approval is required when the allocation is completed by a fleet admin.
Step 4: Verify allocation in the logbook and driver dashboard

- Open the pool vehicle logbook in the pool vehicle table of the applicable vehicle.
- Check that the driver status shows Active for that vehicle, meaning a driver is currently allocated.
- Confirm the vehicle appears as allocated to them.
Step 5: Start the deallocation process
- When the vehicle is ready to be returned, click Deallocate Driver.
- This initiates the process to return the vehicle to pool use availability.
- Review the return details before completing the handback.
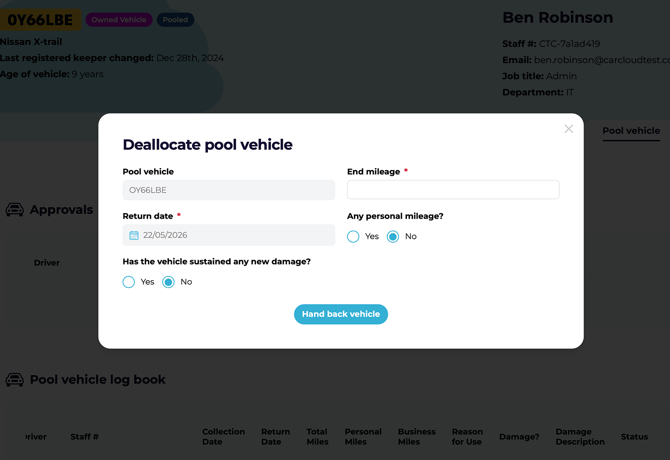
Step 6: Record return details and hand back the vehicle
- Enter the end cumulative mileage if available.
- Confirm the return date is automatically set with the current date and time but can be overwritten.
- Add any personal mileage if applicable.
- Record any new damage to the vehicle.
- Click Hand Back Vehicle to complete the return.
⚠️ Capture any new damage immediately during deallocation. Damage recorded later is much harder to attribute to a specific driver or trip.
💡 Have mileage and damage notes ready before starting deallocation — it makes the return process a 30-second job rather than a five-minute one.
Step 7: Confirm the vehicle is back in pool status
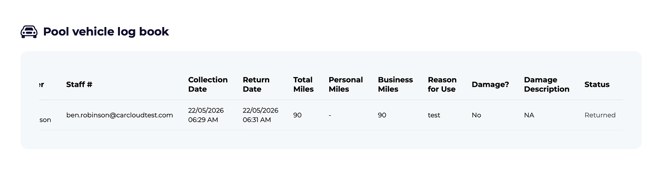
- Check the logbook to confirm the status shows Returned.
- Review the completed business trips for that vehicle.
- Verify the vehicle is now available to be allocated again.
Step 8: Review the mileage summary
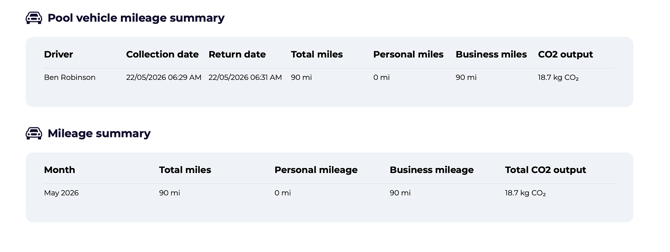
- View the pool vehicle mileage summary table.
- Confirm the total miles completed by the vehicle as a pool vehicle are displayed.
- Use this summary for tracking usage and reporting.
Tips for clean pool vehicle handovers
-
Use today's date as the default collection date unless the handover is scheduled for another day.
-
Keep mileage and damage notes ready before starting the deallocation process to speed up completion.
-
Verify the logbook after each action so you spot any update issues straight away.
-
Encourage drivers to check their dashboard after allocation so they can confirm the vehicle assignment quickly.
What's next?
- See Converting a Vehicle to a Pool Vehicle if you need to move another vehicle into the pool.
- Head to Managing Vehicle Availability if the vehicle needs to be taken out of service.