By the end of this section, you'll be able to:
- Open and navigate the Drivers and Admins pages
- Search, sort, and export user records
- Understand what each account status means
- Edit, add, invite, re-invite, and remove drivers
- Manage admin roles and add new account admins
Step 1: Open the Drivers page
- From the Fleet Dashboard, use the top navigation bar.
- Select Drivers to view all drivers currently in the system.
- Review the driver table to confirm the records you need are available.
Step 2: Search and adjust the driver list view
- Use the search function to find a driver.
- Search using any of the criteria shown in the system.
- Adjust the number of rows displayed per page if needed:
- 5 rows minimum
- Up to 100 rows maximum
💡 Tweaking rows per page can save a lot of scrolling on larger fleets — bump it up for quick scans, drop it down when you're focused on a small group.
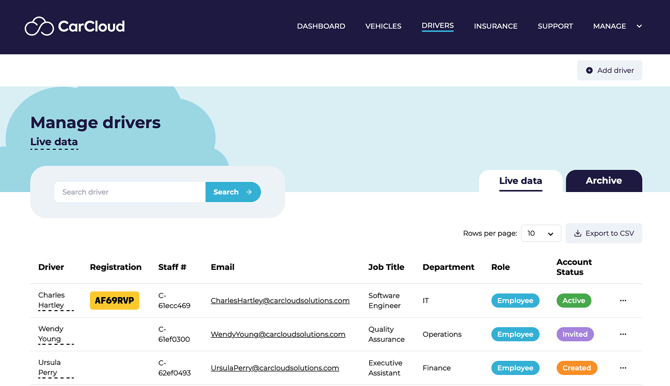
Step 3: Read the allocation indicators
- Review the driver table for key indicators:
- A registration plate in the row means the driver is allocated to a vehicle.
- No registration plate means the driver is not assigned to a vehicle.
- Check these columns for account details:
- Role: employee or contractor
- Account Status: created, invited, or active
Step 4: Understand driver account statuses
Use the Account Status column to determine each driver's current access state:
- Created — the account exists, but the driver hasn't been invited yet.
- Invited — the driver has been invited to join the system.
- Active — the driver has logged in, changed their password, and is actively using the system.
💡 Knowing the status before you act on a record stops you from sending the wrong type of invite — see Step 7 for which invite option pairs with which status.
Step 5: Edit or remove a driver
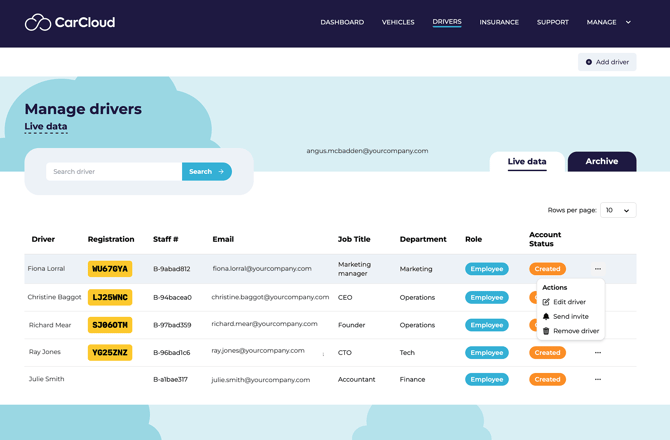
- Open the Actions menu by selecting the three dots on the driver's row.
- Choose Edit Driver to update driver details such as:
- First name
- Last name
- Job title
- Department
- Role
- Update the role as needed:
- Employee
- Contractor
- Admin
- To remove the driver, choose Remove Driver — this takes them out of the live table and adds them to the Archive tab.
💡 Removed drivers aren't gone for good — head to the Archive tab whenever you need to review or restore an old record.
Step 6: Add a new driver
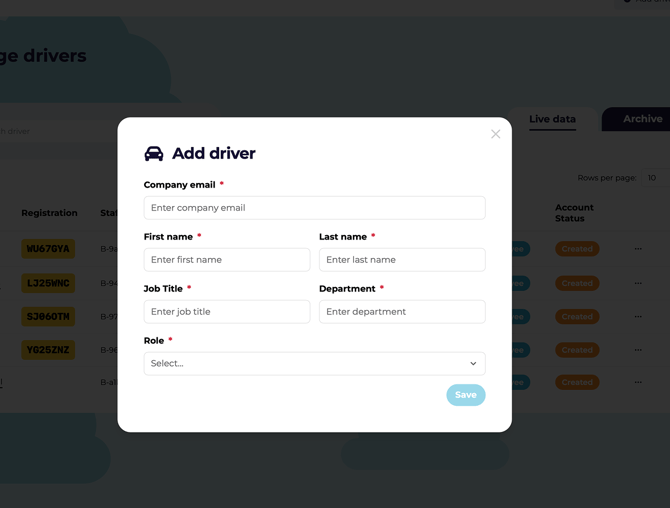
- Select the Add Driver button.
- Enter the required driver information:
- Company email
- First name
- Last name
- Job title
- Department
- Role
- Confirm the details are accurate before saving.
Step 7: Send or resend a driver invite
Once a driver is added to the platform, to view their account and information they must formally accept their invitation
To invite a brand-new driver to the platform, the Admin should:
- Locate a driver with Created status.
- Open the Actions menu for that driver.
- Select Send Invite.
To resend an existing invite:
- Locate a driver with Invited status.
- Open the Actions menu and select Re-Invite (or Resend Invite).
⚠️ Match the invite option to the status: Send Invite for Created accounts, Re-Invite / Resend Invite for Invited accounts.
Step 8: Open the Admins page

- To manage fleet admins and admin accounts, go to the top menu.
- Select Manage.
- Click Admins to view everyone with an admin role in the organisation.
Step 9: Review and update admin accounts
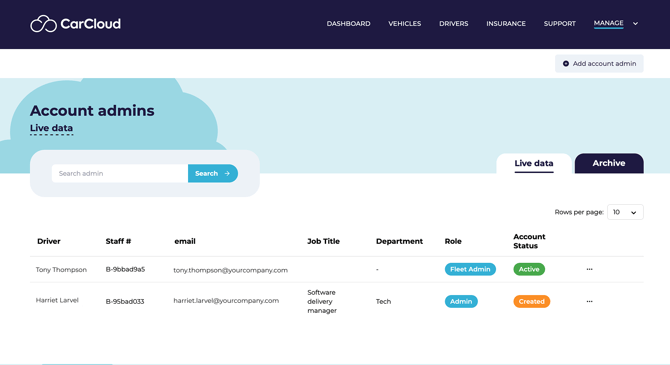
- Use the Admins page in the same way as the Drivers page.
- Review account statuses and the available actions.
- Edit the admin's role if needed.
- If necessary, remove the admin role to return the user to a driver role.
💡 Keep role changes minimal and intentional — clean access control is much easier to maintain than untangle.
Step 10: Add a new account admin
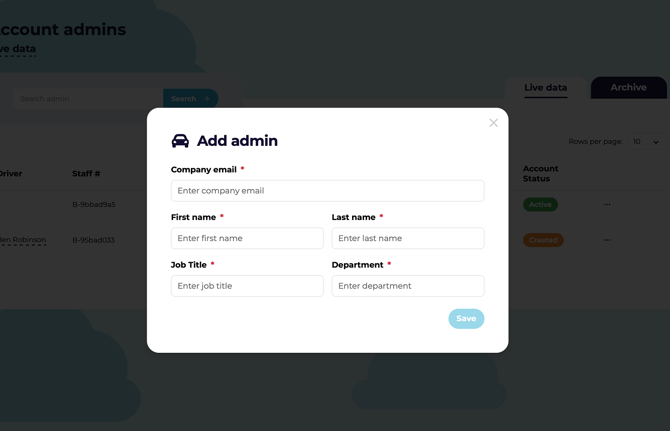
- Select the Add Account Admin button.
- Enter the required information:
- Company email
- First name
- Last name
- Job title
- Department
- Confirm the account details before creating the admin profile.
Step 11: Export driver data
If you require to download your driver data at any point CarCloud provides an easy CSV way for you to download:
- Click Export to CSV button to download the driver table into a usable CSV format.
Tips for keeping driver and admin records clean
- Use the search bar first to quickly locate the right driver or admin.
- Adjust rows per page to reduce scrolling when reviewing large lists.
- Export to CSV when you need to audit, sort, or share records outside the platform.
- Confirm the user's status before taking action so you don't send the wrong invite type.
- Keep role changes minimal and intentional to maintain clean access control.
What's next?
- Visit the Drivers Management page for the wider view of driver lifecycle and ongoing actions.